 The average tin of paint from the store is a cocktail of chemicals and costs a lot of money. While some of the chemicals in them are harmless, many are definitely not. The toxins in common house paints include cadmium, mercury, phenols, chlorine, sulphur, formaldehyde and other volatile organic compounds. These can all cause illness for both the painters and the people who live with the painted surfaces; ranging in severity from headaches and nausea through to cancer. On islands, especially atolls, this can also result in impacts on the freshwater lens (groundwater) inside the island, and chemicals can leach into the lagoon where people go fishing and swimming.
 Eco-friendly paints made at home using natural materials are a great way to reduce costs and make your house healthier to live in. These paints that have been around for thousands of years can be painted on masonry or wood surfaces (as long as they are not already coated with plastic paints) and allow painted surfaces to release moisture naturally. Creating your own paint is considerably less expensive than buying plastic paints and is great for anyone wanting to be more self-sufficient. As suggested by the missionaries, the churches in Tuvalu have been whitewashed using lime burned in pits loaded with reef rocks. These days, it may be easier to import hydrated lime and some pigments (we already bring cement) and make your own paint for your house.
What is paint?
 The simplest and probably oldest type of paint is whitewash. This is made from made from slaked lime (calcium hydroxide) and in some areas has chalk (whiting) added. Whitewash cures through a reaction with carbon dioxide in the atmosphere to form calcium carbonate in the form of calcite, a reaction known as carbonation. It is usually applied to exteriors, but more and more it is enjoying a revival and becoming popular in interiors too. Traditionally it was used internally in food preparation areas, particularly rural dairies, for its mildly antibacterial properties. When the paint initially dries it is uncured and has almost no strength. It takes up to a few days, depending on climate, to harden.
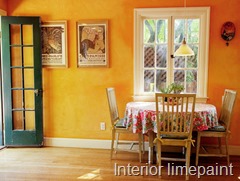 Paint in general consists of colour (the pigment) and the glue in which the pigment is suspended (the binder), and may also contain ingredients that add texture and bulk (fillers), a thinner (the solvent) and other additives, such as biocides (e.g. anti-fungal agents) and drying catalysts.
Pigments are safer alternatives to the toxic compounds and heavy metals used to colour conventional paint include natural pigments derived from plants, insects, iron oxides and minerals. These are usually in powder form at artists’ supply stores.
Binders. Binders keep paint glued to a surface. The acrylic and vinyl binders in commercial paints are derived from the by-products of refining crude oil. The binders in natural paints rely instead on materials such as starch (from flour), casein (the protein in milk) and linseed oil (from pressed flax seeds).
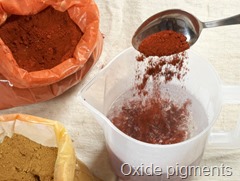 Fillers. Fillers create texture and add bulk to paint. Common fillers include whiting (powdered chalk), talcum, limestone, silica and marble. Clay is a popular filler to pair with flour, because it reinforces the binding ability of starch, and it’s abundant and potentially free if you have clay soil.
Solvents. Solvents, or thinners, help achieve a workable consistency. In lime paints the solvent is plain water. The solvents in commercial paints are usually made from organic materials, but they will evaporate or “outgas,” causing that new paint smell. The outgassing of these volatile organic compounds (VOCs) can cause headaches, nausea, dizziness, blurred vision and fatigue, especially in areas that are not well ventilated. The hazards are significantly worse for people who paint regularly. Natural solvents such as citrus thinners and natural turpentine are preferable, but they can still emit low levels of VOCs.
Additives. Commercial paint manufacturers frequently include several additives in their products, but they aren’t required to list them on the can. Additives include plasticizers, foaming and antifoaming agents, driers, biocides that inhibit the growth of mould, and ingredients that improve water resistance or opacity.
Natural Paint Recipes for Islands
Basics
Limewater (a pre-paint treatment): Mix 1 part hydrated lime with 5 parts water. Stir well till all lumps gone. Set aside to settle and after 24 hours all the lime has sunk to the bottom. The water above the lime is limewater. The layer of crystals that has formed on the surface of the water must be removed. Use the water as a primer and/or top coat. The water is strongly alkaline and has a pH of around 12.5 so careful with touching it with your skin.
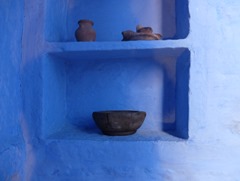
Lime milk: This is a mixture of 1 part powdered hydrated lime mixed with 5 parts water. The mixture is stirred well until all lumps are removed. After about 10 minutes, a good lime milk is created. It can stand several days before use. You can add a little collagen glue to the solution to stop the lime rubbing off. Pigments can be added, with the best ones being iron oxides (ochres) and blue ‘ultramarine’. The pigments should be mixed with water and made into a thick paste before adding to the lime milk.
Method: Lime paints are best applied directly to completely fresh render. Old render or existing lime paint needs to be brushed clean of dust and dirt to make sure the paint binds properly. The walls to be painted should be moistened beforehand with lime water.
 Lime needs several days to become properly bound to the surface. It is important that the render and layer of paint do not dry out during this period. In dry weather the wall should be watered when it feels dry, especially if exposed to direct sun. Indoors a spray bottle can be used. Painting is therefore best done during damp periods so the paint does not dry out too fast and has the time to cure. The painted surface should be protected from sunlight for at least 14 days.
Recipes
Cement paint: Mix 5 parts skimmed milk (can make from powder) with 1 part portland cement. Add pigments up to 5% by weight. This mixture is suitable for wood and masonry. It must be stirred while being used. The paint is very durable.
Whitewash: 10 pounds hydrated lime | 2 gallons water | 3 pounds salt | 2 x 5 gallon buckets | Large spoon
Using a large spoon, mix 10 pounds of hydrated lime with 1 gallon of water in an extra-large bucket. Add more water if needed to make a thick paste. In a second bucket, mix one gallon of warm water with 3 pounds of salt and stir until dissolved. Slowly add the salt water to the lime mixture, stirring well. If mixture is too thick to apply with a paint brush, slowly add additional water to thin to the desired consistency. If covered tightly, you can store whitewash for several days in a cool place. http://alabamachanin.com/journal/2013/07/a-recipe-for-homemade-paint/
Whitewash / White lime: The surface is painted with lime water, followed by 2-3 coats of lime milk, then another coat of limewater.
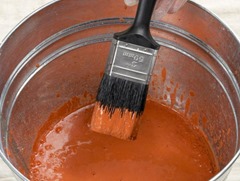 Basic Coloured Lime paint: 1. Prepare the pigment: Add powdered pigment to a jug of hot water. Using a hand whisk, mix the liquid to disperse the pigment. Add more of the same or different-coloured pigments to alter or intensify colour. 2. Mix Lime Putty: Use a trowel to make sure the pre-mixed lime putty is sufficiently mixed. Aim for a thick, creamy consistency. Transfer three trowel-fulls of the lime putty to a clean bucket. 3. Add Water slowly to the lime putty. The ratio of water to putty may be 50:50, or even greater depending on its original consistency. Mix the lime putty and water with a stirring paddle until the mixture is thin and creamy in consistency. You may add flaxseed oil (coconut oil?), especially if the limewash is for exterior use (the oil aids adhesion and durability). As a guide, use a ratio of 12:1. 4. Add the pigment: Pour the mixture through a sieve and into a second bucket. Add any coloured pigment at this stage, again mixing it together with a stirring paddle. 5. Mix Lime Wash: Mix the lime wash again. It should have a thinner consistency (ideally milk-like) because of the dilution with the pigment. Give the lime wash a final sieve and stir. http://www.diynetwork.com/how-to/skills-and-know-how/painting/how-to-make-limewash-paint
Milk paint: 1 lemon | 1 quart skim milk | Strainer or sieve | Cheesecloth | Dry colour pigment (optional) | Mask
Mix the juiced lemon with 1 quart of skim milk in a bucket and leave the mixture overnight. (Sitting at room temperature causes the mixture to start curdling.) The next morning, pour the mixture through a strainer or sieve lined with cheesecloth to separate the solids and whey. To give colour to your paint, you may choose to add four or more tablespoons of dry colour pigment to the curd and stir until the pigment is incorporated. Continue to add colour pigment, stirring constantly, until you achieve the desired hue (Be sure to wear a mask when using dry pigments and/or follow the manufacturer directions). Milk paint will spoil quickly, so it should be applied to your surface within a few hours of mixing. The recipe above makes a small batch, so you will want to test this on a smaller project to get started.
The first milk paints were dyed with pig’s blood, these days you can buy both natural pigments and the colour pigments mentioned in the recipe above in a range of shades. You can also experiment by leaving steel wool in a dish of water and adding the resulting rusty water to your paint; simmering plants on the stove and straining the liquid; brewing and adding strong coffee for the desired shade of brown; or adding store-bought juice concentrates to your paint. http://alabamachanin.com/journal/2013/07/a-recipe-for-homemade-paint/
Lime casein paint: By adding casein to the lime, a casein glue is formed making the paint cover better and more elastic (less brittle). This is used for fresco painting (that is over wet plaster) and for wooden surfaces. The paint is waterproof. Mix 1 part hydrated lime with 0.5-1 part of curds (containing about 12% casein). Make sure all the lumps are worked out by the mixing. Add 20-40% stirred pigment (thinned with skimmed milk) of titanium oxide (white), or red or yellow ochre or other earth pigments. The surface should be coated with limewater before painting.
Lime, milk and plaster of Paris paint: Ingredients: 1.5 cups skim milk | 30g lime | 240 g Plaster of Paris | Pigment.
1. Mix skim milk with lime while stirring briskly until the lime is thoroughly dispersed. Add plaster of Paris and pigment until desired colour is achieved. 2. Notes: Allow the mixture to sit for an hour or until it stops bubbling.
When painting, stir the mixture every five minutes to prevent the solid ingredients settling.
Casein Paint with Lime: Yields about 1 quart. Ingredients: 1 gallon non-fat milk | 2.5 ounces “Type S” lime (dry powder) | 2.5 cups water | Natural earth pigment (depending on desired colour) | 6 cups filler (usually whiting).
 1. Leave milk in a warm place for a few days to curdle. Then pour through a colander lined with cheesecloth. You should have about 2 cups of curds. The whey can be composted. 2. Mix curds and lime powder in a blender. Add a little water if the mixture isn’t blending well. Strain to remove any lumps. 3. Add water to the binder immediately after it is prepared. 4. Dampen and crush pigments. Add them to the mixture a little at a time until desired colour intensity is achieved. 5. Stir in filler.
Application, Safety & Cleaning Up
Lime wash is applied in much the same way as most emulsion or water-based paints. It is important to keep a wet edge as the finish can become patchy where overlaps have occurred. Unlike conventional paints, lime wash is always applied to a dampened surface (use a small hand-pumped spray) rather than directly to a dry substrate. It should not be applied in very cold, hot or wet conditions. Keep stirring the paint as you apply to keep the mixture consistent.
Although lime paints do not contain any toxins, they are highly caustic (alkaline) and can burn skin and eyes, having a pH of around 12.5. It is a good idea to wear protective gloves and goggles when handling them. Do not inhale the dry form of lime or pigments. Treat them like you do cement.
Lime and cement paints are water-based so cleaning your equipment is easy. Use water, and a little soap. Unlike commercial synthetic paints, the residue can safely be poured onto the garden, though be careful not to tip too much lime on one area.
Sources
http://www.motherearthnews.com/diy/natural-paint-zmaz06onzraw.aspx
http://www.piclist.com/techref/other/paints.htm
Old House Journal July-August 1991
Berge, B. 2009. The Ecology of Building Materials. Routledge, 448pp.
http://www.diynetwork.com/how-to/skills-and-know-how/painting/how-to-make-limewash-paint
http://alabamachanin.com/journal/2013/07/a-recipe-for-homemade-paint/
