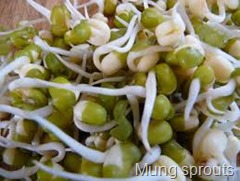
 Did you know that sprouts are enzyme-rich, high in amino acid (protein) content, bursting with minerals and trace minerals, and are packed with chlorophyll? According to Rawlicious, “sprouts are also healing and therapeutic, cleansing and alkalizing, and filled with antiaging antioxidants. Because they are so high in minerals and enzymes, they facilitate digestion, detoxification, and weight loss.” And they taste fantastic too!
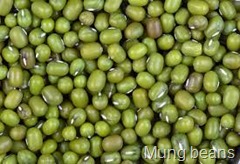
Mung or moong beans are available in many stores in Pacific Island Countries because of the Fiji link to Indo-Fijian cuisine. They are viable – we have tried them with great success.
Here’s how to grow your own sprouts:
The Glass Jar Method
 There are many different sprouting kit options, ranging from stackable plastic rings to glass jars, sprouting bags, and automatic sprouters. My favourite is the glass jar method. Sprouting with this simple system involves soaking your chosen seeds overnight and covering the jar with a mesh screen and rubber band. In the morning drain the soak water and rinse the seeds twice daily, placing them on a rack to drain during the day. Harvest them within three to seven days. Some of the easiest sprouts to grow are alfalfa, fenugreek, radish, broccoli, mung beans, onion, cabbage, mustard seeds,
  chickpeas, quinoa, lentils, pea sprouts, and wheat seeds. For most sprouts, continue to sprout them until they have developed a long tail or their first leaves have begun to go green. In the case of chickpeas, quinoa, pea sprouts, and lentils, they are ready to eat as soon as their tails begin to unfurl or emerge from the seed.
Sprouting Buckwheat
Buckwheat is a very versatile seed that has many uses in raw dishes. Sprouting buckwheat takes a little more attention. Soak the seeds overnight in a glass jar. In the morning rinse thoroughly. Place the seeds in a large bowl or glass jar and cover with a dish towel. Allow to sprout for one to two days. The sprouts are ready as soon as the little tail has emerged from the seed. Buckwheat releases a gelatinous substance that needs to be rinsed away thoroughly in order to avoid mold.
Soil-grown Microgreens
 Another way of growing sprouts is directly in soil trays. These kind of sprouts are called microgreens. My favorites are wheatgrass, barleygrass, or sunflower greens.
How to grow soil-based sprouts:
Buy trays and organic growing soil from a garden nursery. Fill the trays with soil. Soak wheat, barley, or sunflower seeds overnight. Drain them in the morning and allow them to stand in a bowl for 24–48 hours. Small tails will sprout. Place the seeds on top of the soil, cover with another thin layer of soil, and lightly water them. Place them in an area that gets either the morning or afternoon sun (midday summer sun will burn the young shoots) and water daily. Harvest the wheatgrass or barleygrass after seven to ten days and juice it. Harvest the sunflower sprouts after seven to ten days and either juice them or eat them in salads.
To provide your soil-grown sprouts with a full complement of minerals and trace minerals, take Himalayan rock salt and make a salt-water solution of one part salt to 200 parts water. Water the sprouts from day four to day seven with this salt-water solution. Alternatively, get sea water (from a clean source, preferably a few miles out to sea) and make the solution from one part sea water to 20 parts fresh water and proceed as before. You will have the healthiest looking, best-tasting, super-nutritious sprouts around.
By Talia Shapiro | (Source: Nab Communities; February 8, 2011; http://tinyurl.com/n4lbta2)
